Meet the 24V-X2-SB18-TV1

Key Components
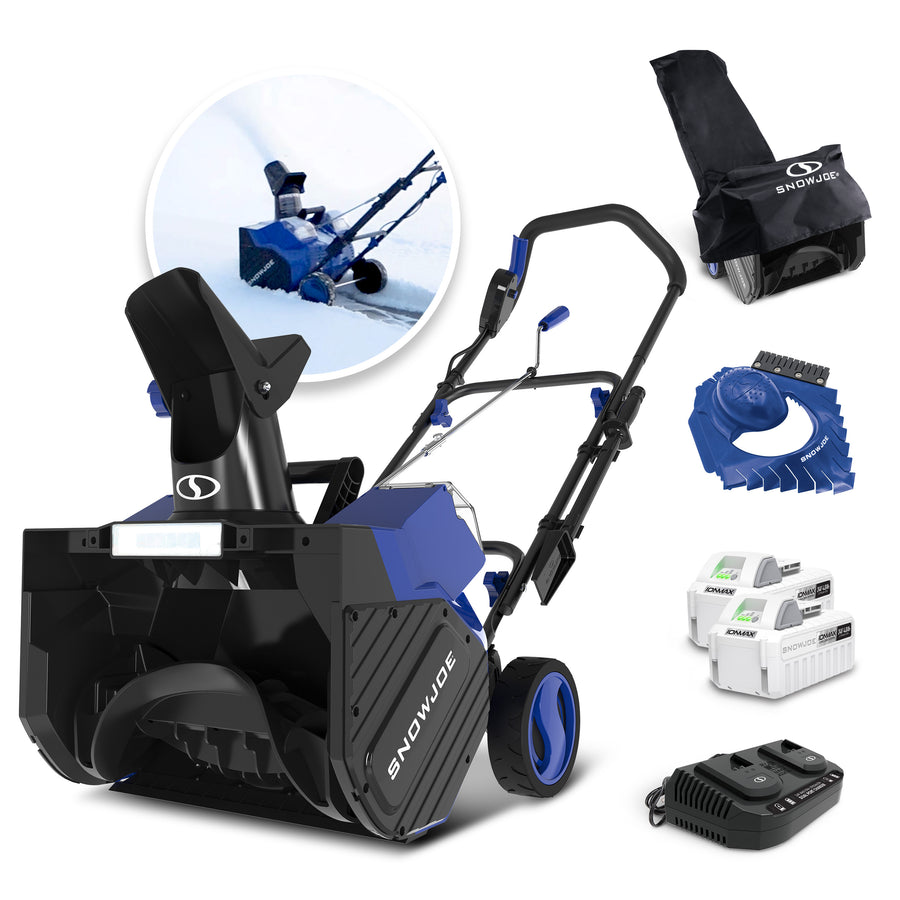
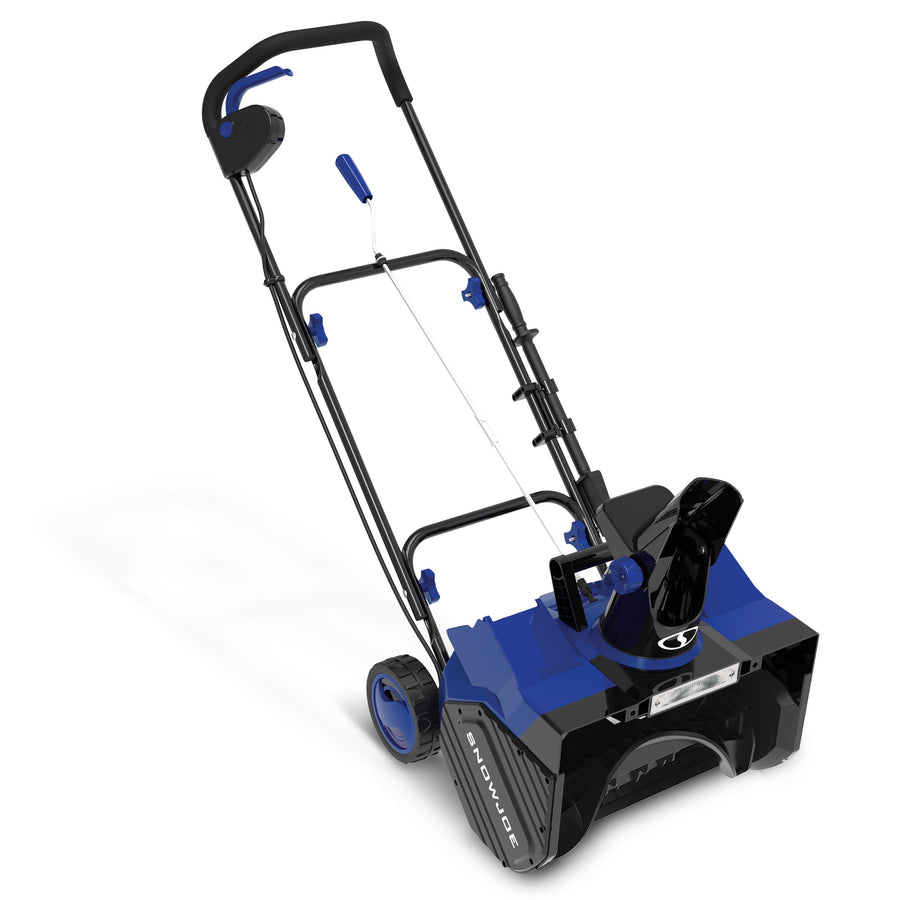
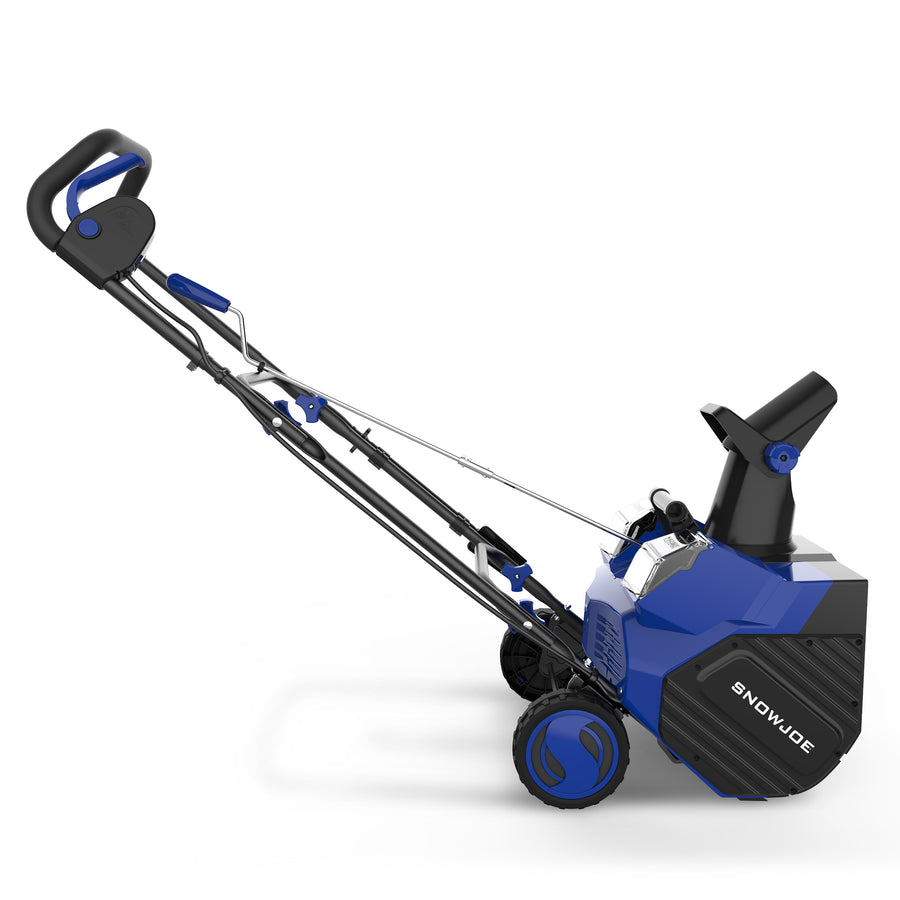
Handle bar — main grip area for pushing and controlling the snow blower
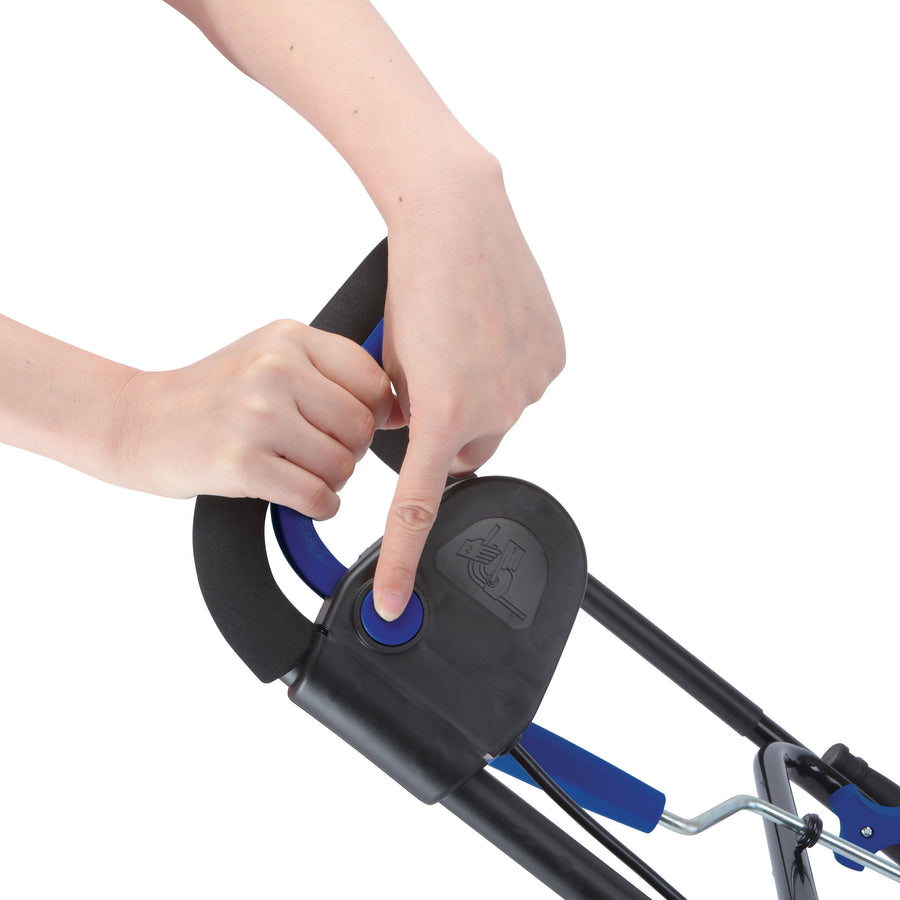
Safety lock button + ON/OFF trigger — two-step start control to help prevent accidental starting
Dual battery compartments — hold two compatible 24V IONMAX™ batteries
Auger — 4 rubber-tipped steel blades move snow through the housing
Scraper bar — helps clear snow close to paved surfaces
Discharge chute + chute crank — adjusts snow discharge direction up to 180°
Chute deflector + deflector knob — controls the height of the snow stream
LED headlight — illuminates the forward clearing path while the blower is running
Clean-out tool — clears chute buildup safely without using hands
Wheels — help maneuver the snow blower during clearing and transport
Snow thrower cover + storage bag — included cover system for storage protection
Ice + snow windshield scraper — included bundle accessory for vehicle glass cleanup
Technical Specifications
| Specification | 24V-X2-SB18-TV1 |
|---|---|
| Product Type | Cordless single-stage snow blower |
| Best Use | Decks, driveways, and walkways |
| Motor | 1200 W brushless |
| Battery Voltage Max | 48V DC max / 2 x 24V batteries |
| Battery Capacity | 4.0 Ah |
| Battery Compatibility | Compatible with 24V IONMAX™ batteries except 8.0 Ah and above |
| Charger Input | 120V AC, 60 Hz, 160 W |
| Charger Output | 26V DC, 2 x 2.2A |
| Charge Time Max | 1 hr 50 mins |
| No Load Speed | 2500 rpm |
| Auger | 4 rubber-tipped steel blades |
| Clearing Width | 18 in. / 46 cm |
| Depth of Snow Cut | 10 in. / 25.4 cm |
| Throw Distance Max | 20 ft / 6 m |
| Plowing Capacity Max | Up to 700 lbs/min |
| Snow Type | Light, fluffy snow |
| Directional Control | 180° adjustable chute |
| LED Light | 2 W |
| Tire Size | 6.5 in. / 16.5 cm |
| Net Weight | 32.4 lbs / 14.7 kg |
| Warranty | 3 Year Warranty |
What's in the Box
| Included Item | 24V-X2-SB18-TV1 Bundle |
|---|---|
| Cordless snow blower | ✔ |
| Joint-fixing knob and bolt sets | ✔ 4 sets |
| Upper crank rod | ✔ assembled |
| Clean-out tool | ✔ assembled |
| 24V IONMAX™ 4.0 Ah lithium-ion batteries | ✔ 2 batteries |
| 24V IONMAX™ lithium-ion dual-port charger | ✔ |
| Snow thrower cover | ✔ |
| Cover storage bag | ✔ |
| Ice + snow windshield scraper | ✔ |
| Manual with registration card | ✔ |
Assembly
-
Set the chute deflector
Loosen the deflector knob, lift the chute deflector, lock it securely onto the discharge chute, then adjust the height of the snow stream.
-
Install the lower chute crank
Insert the lower crank rod into the opening at the back of the housing, align the holes, and secure it with the hitch pin.
-
Install the upper chute crank
Slide the upper chute crank through the rubber ring on the middle frame, connect it to the lower chute crank, align the holes, and secure it with the hitch pin.
Getting Started
-
Charge both batteries first
Place both 24V IONMAX™ batteries on the dual-port charger. Red lights indicate charging; green lights indicate fully charged. A fully discharged set charges in about 1 hr 50 mins in the normal temperature range.
-
Check battery charge level
Press the charge-level button on each battery. Three lights indicate high charge; one light means the battery should be charged immediately.
-
Inspect the clearing area
Remove stones, toys, broken glass, nails, wire, string, and other objects that could be picked up and thrown by the auger.
-
Install both batteries
Open the battery compartment covers and slide each battery down until it clicks and locks into position.
-
Start the snow blower
Press and hold the safety switch button, then pull the ON/OFF trigger toward you. Once the machine starts, release the safety switch button.
-
Clear at a steady pace
Push gently and evenly according to the snow blower’s throw rate. Overlap clearing paths for best results.
-
Adjust snow direction and height
Rotate the chute crank to adjust the discharge chute up to 180°. Loosen the deflector knob to raise or lower the snow stream, then tighten the knob.
-
Stop the unit
Release the ON/OFF trigger. Wait for all moving parts to stop before cleaning, inspecting, or storing the unit.
Maintenance & Care
Run briefly after snow clearing
After each snow removal session, run the snow blower for a few minutes to help prevent the collector/impeller and auger from freezing.
Remove residual snow and ice
Shut off the motor, wait for all revolving parts to stop, remove the batteries, then wipe residual snow and ice from the unit.
Rotate the chute after use
Rotate the chute deflector by the chute control crank several times to remove excess snow buildup.
Check hardware often
Inspect bolts and screws at frequent intervals and tighten as needed to keep the equipment in safe working condition.
Care for batteries and charger
Do not immerse batteries or charger in liquid. Clean charger vents and electrical contacts with compressed air. Use only mild soap on a damp cloth when cleaning plastic surfaces.
Store indoors
Remove both batteries and store the snow blower indoors in a locked, dry place out of reach of children. Use the included storage cover when desired.
No lubrication needed
Lubrication is not necessary and may damage the unit. The motor and auger are lubricated for lifetime use at the factory.
Troubleshooting Guide
Only perform the steps described below. If the issue cannot be resolved, contact Shop Joe customer support or an authorized service center.
Possible Causes
- One or both batteries are not installed correctly
- Only one battery is installed
- Batteries are discharged
- Start sequence was not followed
Solutions
- Install both batteries until each clicks into place
- Use two batteries of the same voltage and capacity
- Charge both batteries before use
- Press the safety switch button first, then pull the ON/OFF trigger
Possible Causes
- Batteries are not fully seated in the charger
- Battery temperature is too hot or too cold
- Charger is not plugged into the correct outlet
Solutions
- Remove and reinsert both batteries into the charger
- Allow batteries to return to the normal charging range
- Confirm the charger is plugged into a 120V AC outlet
- Contact support if charger lights do not come on after reseating the batteries
Possible Causes
- Battery charge is low
- Snow is too deep, wet, packed, or heavy
- Snow blower is being pushed too fast
- Loose surface material may be entering the auger area
Solutions
- Recharge both batteries
- Clear within the recommended 10-inch depth per pass
- Push gently and evenly according to the unit’s throw rate
- On gravel or unpaved areas, push down on the handle to raise the scraper bar above loose material
Possible Causes
- Wet, packed, or heavy snow is blocking the discharge chute
- Snow is being cleared faster than the unit can discharge it
Solutions
- Turn the motor off
- Remove both batteries
- Wait 10 seconds for the impeller blades to stop
- Use the clean-out tool, not your hands, to clear the chute
- Resume clearing at a slower, steady pace
Possible Causes
- Extreme temperatures caused parts to freeze
- Residual snow or ice remained after use
Solutions
- Stop the snow blower and remove both batteries
- Inspect for frozen parts
- Free all frozen parts before restarting
- Never force frozen controls
- Run the unit briefly after clearing snow to help prevent freezing
Possible Causes
- Foreign object may have entered the snow blower
- Part may be worn, loose, damaged, or misaligned
Solutions
- Stop the machine immediately
- Remove both batteries
- Inspect the unit for obstructions or damage
- Repair or replace damaged parts before restarting
- Contact support if abnormal sounds continue
Video Guide
Frequently Asked Questions
What comes with the 24V-X2-SB18-TV1 bundle?
How wide and deep does it clear?
How far can it throw snow?
Can I run the snow blower with only one battery?
Is it compatible with all 24V IONMAX™ batteries?
What type of snow is this model designed for?
What optional accessories are listed for this model?
Compatible optional accessories listed for this model include:
- 24VBAT — 24V IONMAX™ 4.0 Ah lithium-ion battery
- 24VBAT-XR — 24V IONMAX™ 5.0 Ah lithium-ion battery
- 24VCHRG-QC — 24V IONMAX™ quick charger
- 24VCHRG-DPC — 24V IONMAX™ dual-port charger
- SJCOT — universal snow thrower chute clean-out tool