
Meet the X20 StormJet Series
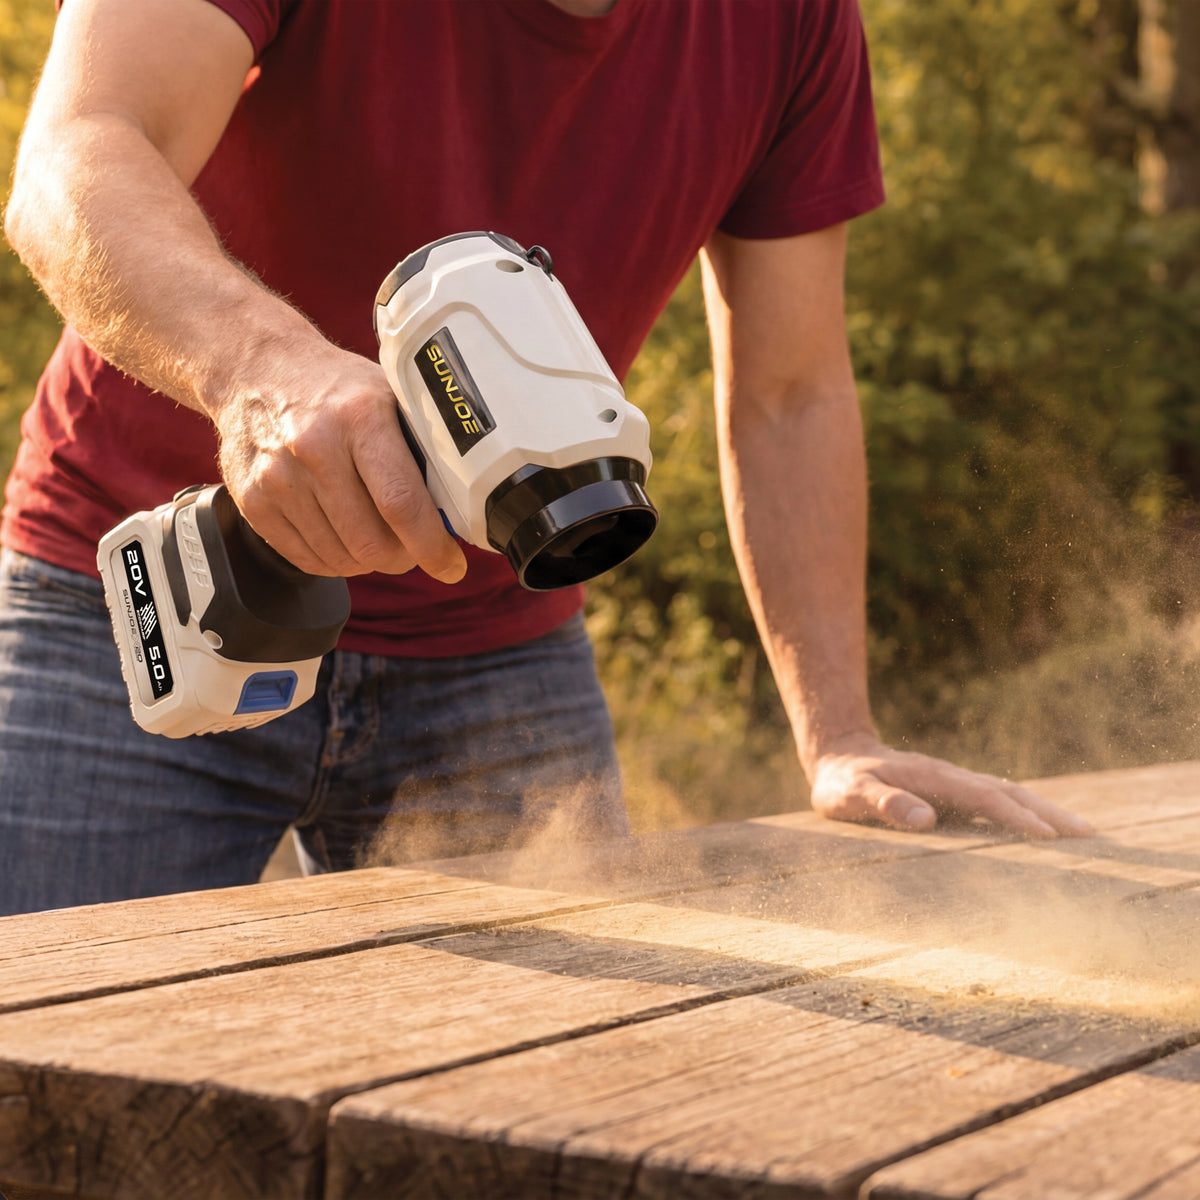

Key Components
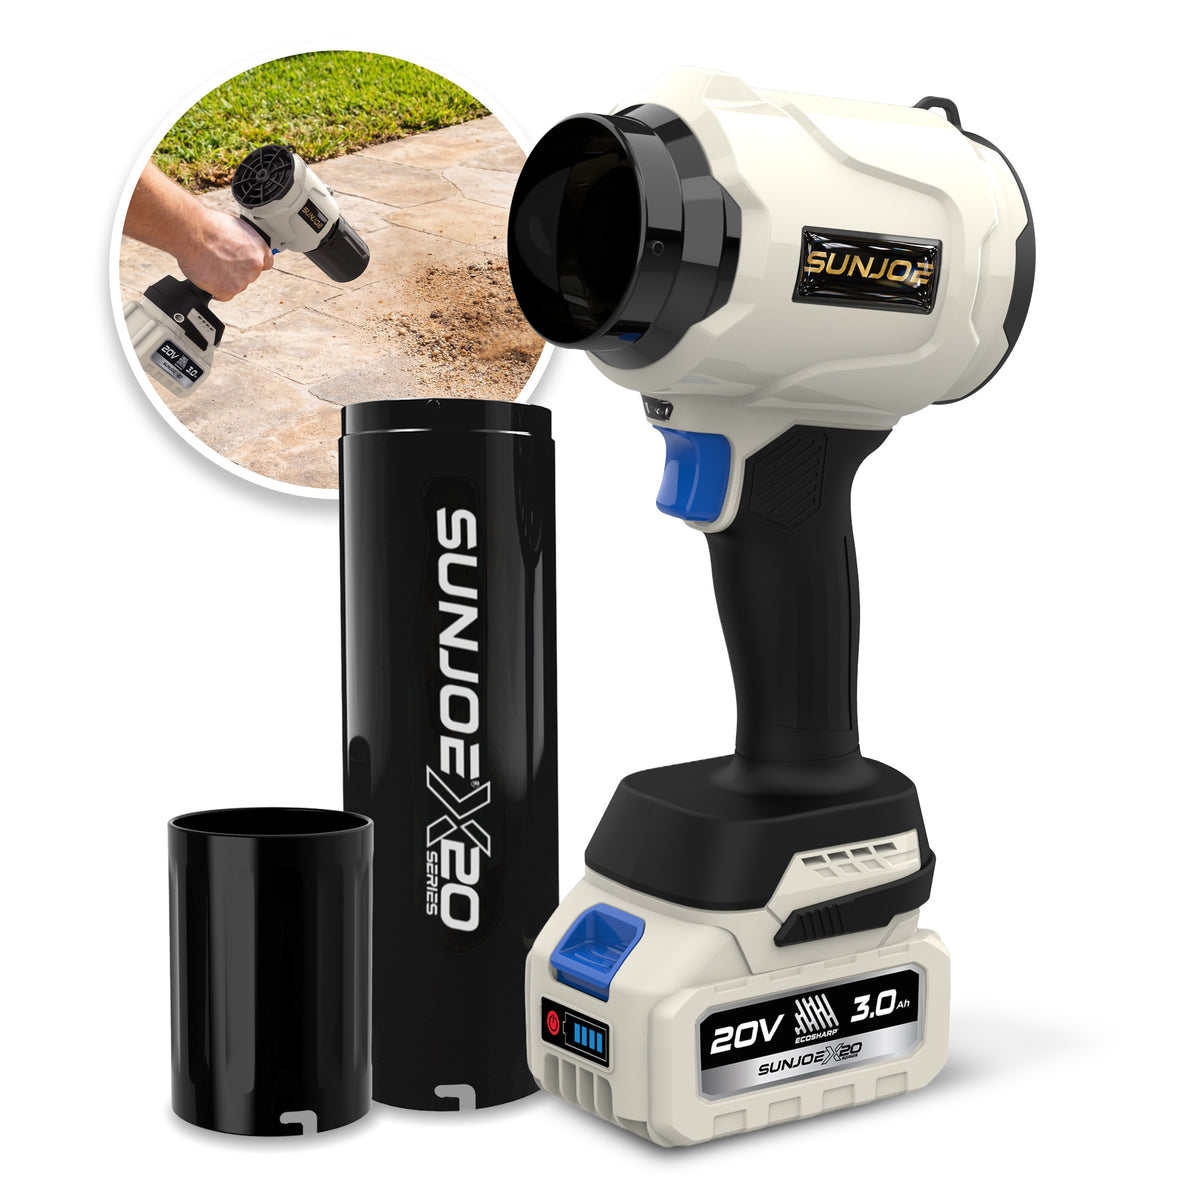
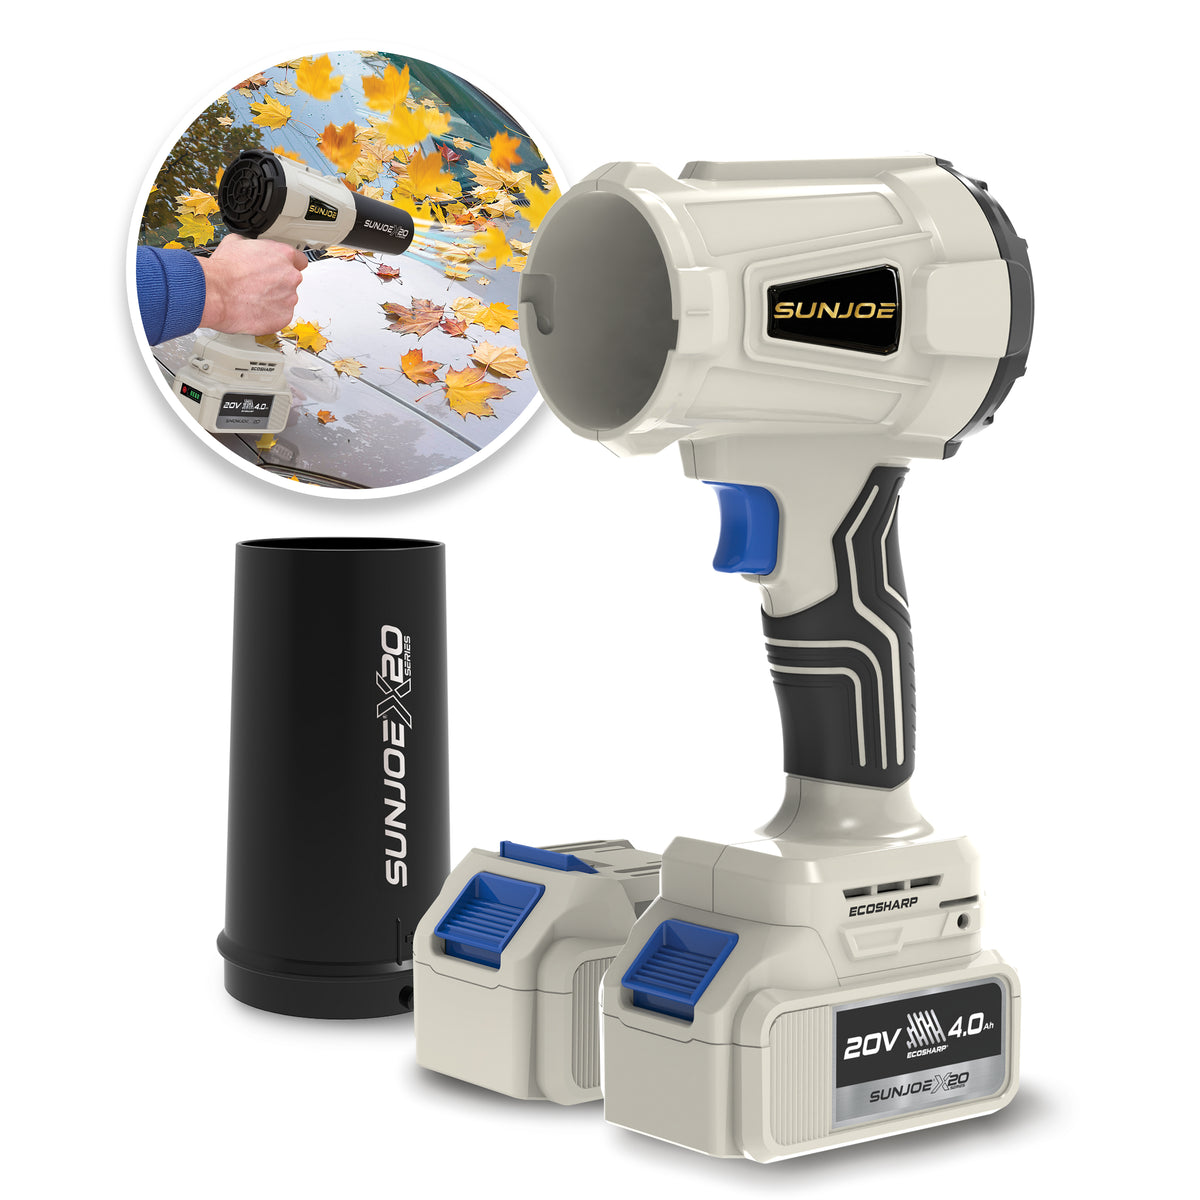
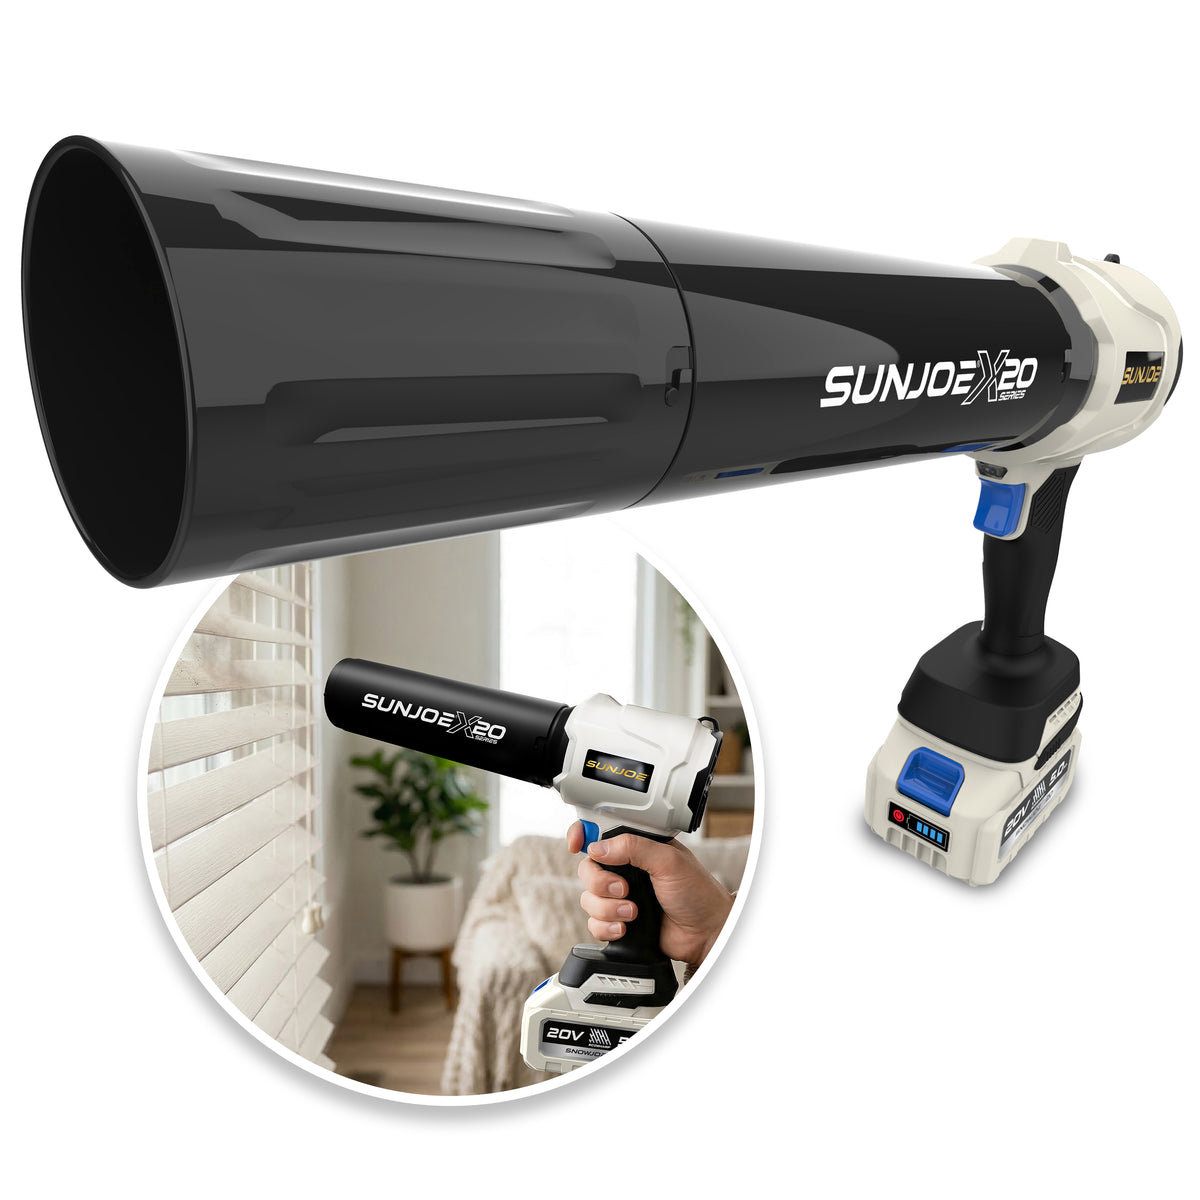
On/Off switch - press fully to run the blower and release to stop.
Handle - the primary one-hand grip for carrying and operation.
Battery compartment - locks one 20V ECOSHARP® battery into the tool at a time.
Air inlet - feeds working and cooling air to the fan; keep it clear.
Blower body - houses the motor, fan, controls, and battery interface.
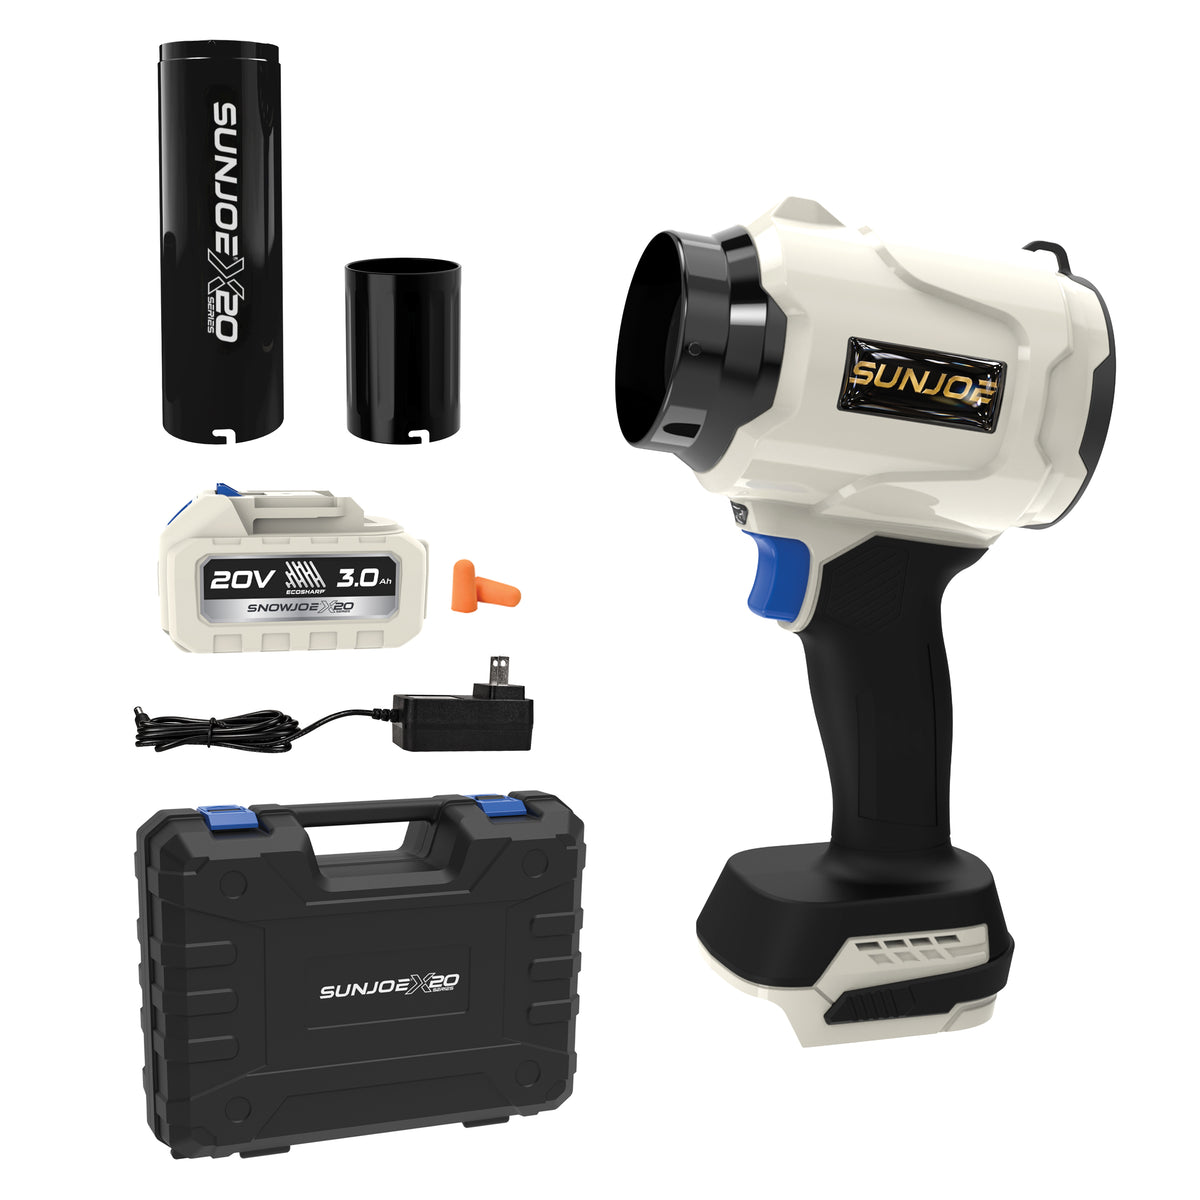
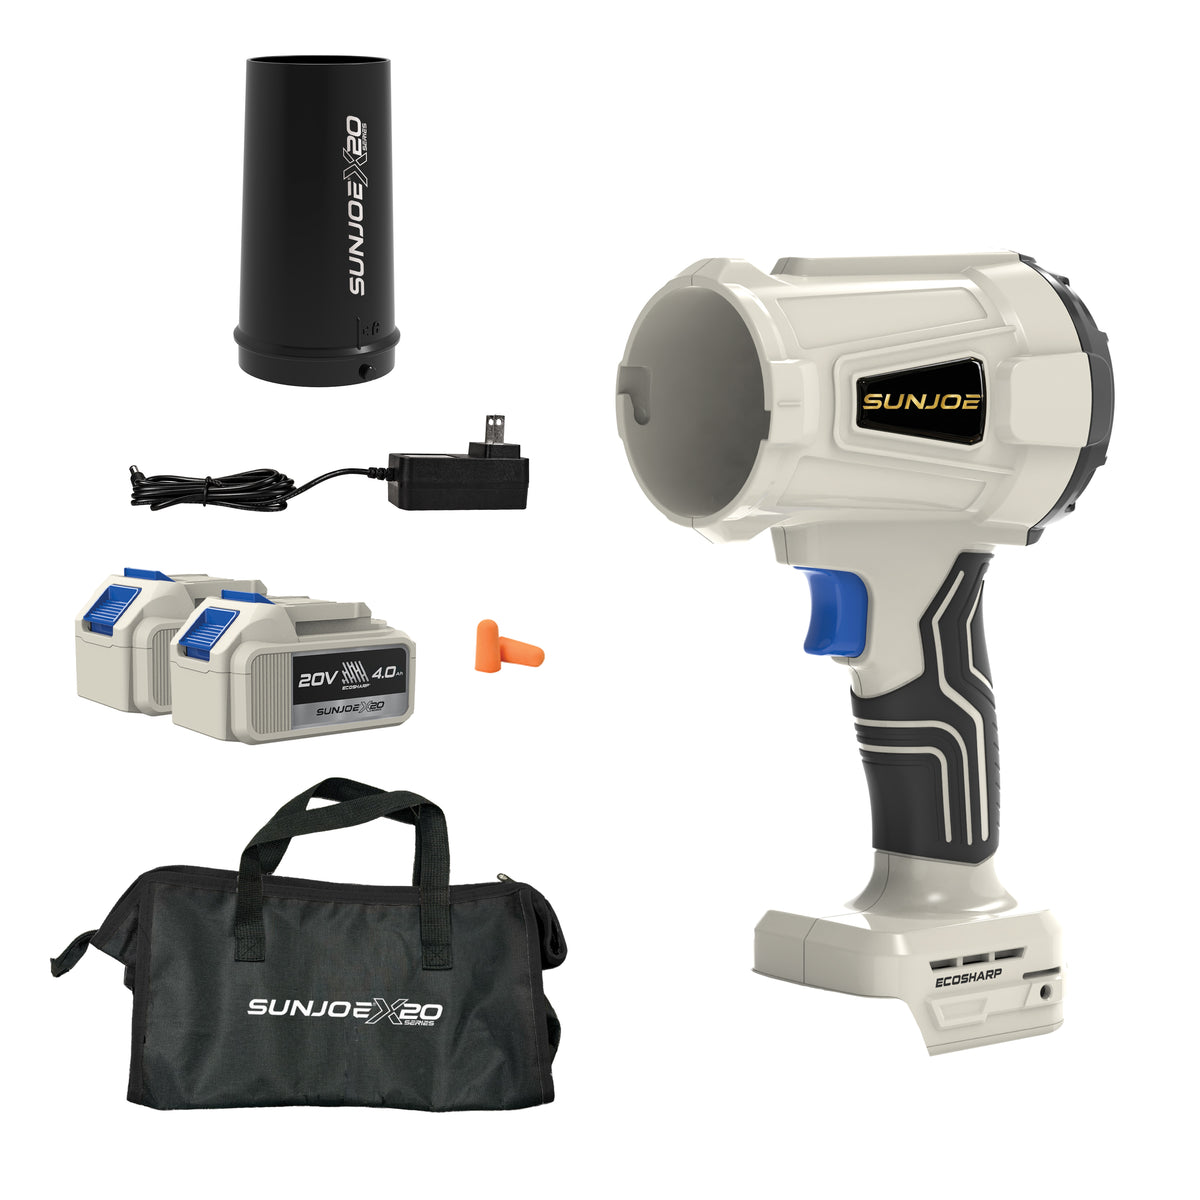
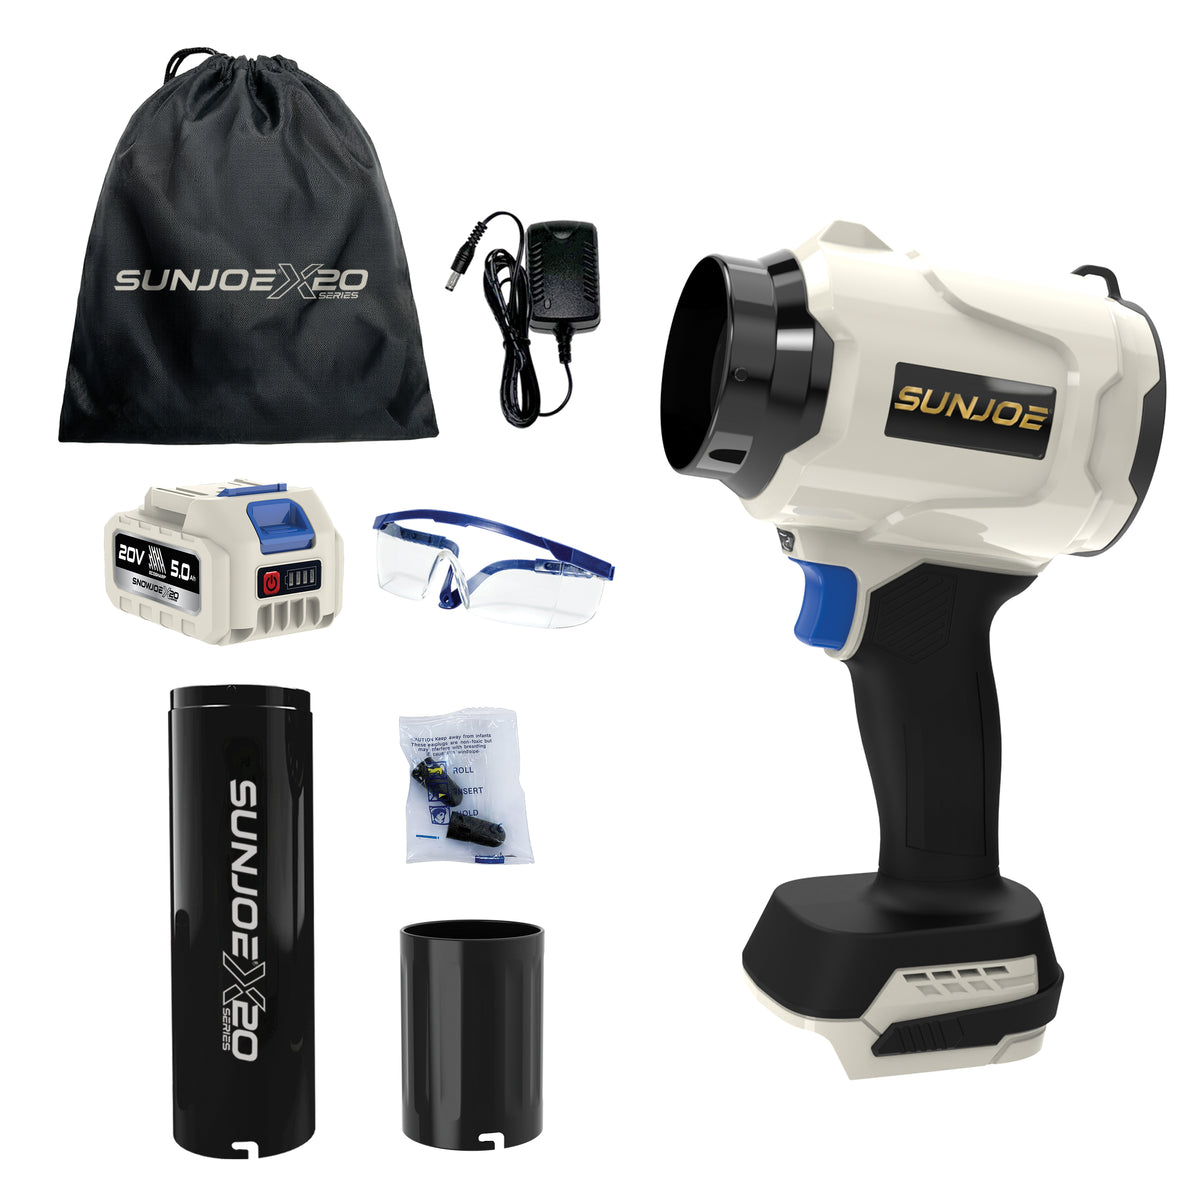
Blower nozzle system - a one-piece turbo nozzle on 3A, a one-piece round blower nozzle on 4AX2, and an extension plus turbo nozzle on TV1-based kits.
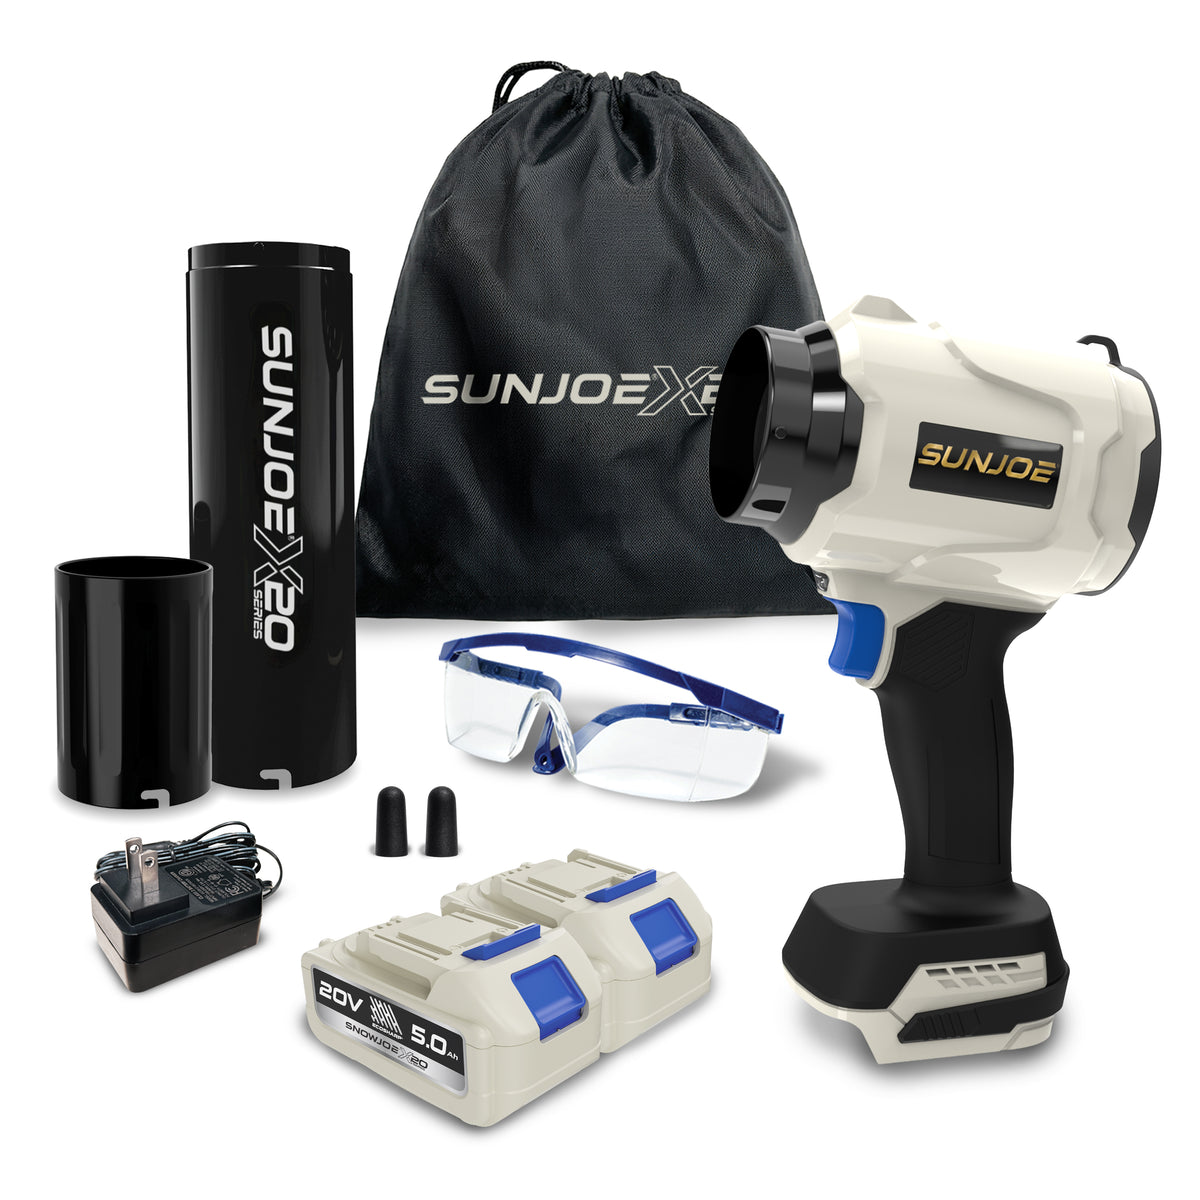
20V battery pack - capacity and quantity depend on the selected kit.
Battery indicator - four LEDs on 3A and 4AX2 packs; three LEDs on the published TV1 5.0 Ah pack.
21V charger - connects to the charge port on one battery at a time.
Storage and safety items - vary by kit; see the published kit-content table below.
Model & Kit Comparison
| Battery Option | Official Kit SKU | Blower Platform | Included Battery | Best Fit |
|---|---|---|---|---|
| 3.0 Ah | X20-STORMJET-3A | 340 CFM / 330W | 1 × 3.0 Ah | Full-output kit with the shortest published charge time and hard shell case |
| 2 × 4.0 Ah | X20-STORMJET-4AX2 | 200 CFM / 250W | 2 × 4.0 Ah | Controlled cleanup with a spare battery ready for extended work |
| 5.0 Ah | X20-STORMJET-TV1 | 340 CFM / 330W | 1 × 5.0 Ah | Full-output kit with higher-capacity battery and safety accessories |
| 2 × 5.0 Ah | BDL-A0311 | X20-STORMJET-TV1 blower | 2 × 5.0 Ah | TV1 kit with a second 5.0 Ah battery for the longest two-pack capacity |
Technical Specifications
| Specification | X20-STORMJET-3A | X20-STORMJET-4AX2 | X20-STORMJET-TV1 | BDL-A0311 |
|---|---|---|---|---|
| Motor | 330W | 250 W | 330W | 330W TV1 blower |
| Motor Speed | 32,000 ±5% RPM | 22,000 ±5% RPM | 32,000 ±5% RPM | 32,000 ±5% RPM |
| Maximum Airflow | 340 CFM | 200 CFM | 340 CFM | 340 CFM |
| Battery Voltage | 20V max* / 18V nominal | 20V max* / 18V nominal | 20V max* / 18V nominal | 20V max* / 18V nominal |
| Included Batteries | 1 × 3.0 Ah | 2 × 4.0 Ah | 1 × 5.0 Ah | 2 × 5.0 Ah |
| Charger Input | 100-240V AC, 50/60 Hz, 0.5 A max | 100-240V AC, 50/60 Hz, 0.5 A max | 100-240V AC, 50/60 Hz, 0.5 A max | 100-240V AC, 50/60 Hz, 0.5 A max |
| Charger Output | 21V DC, 750 mA | 21V DC, 750 mA | 21V DC, 750 mA | 21V DC, 750 mA |
| Maximum Charge Time | 4 hours 30 minutes per pack | 5-6 hours per pack | 7 hours 30 minutes per pack | 7 hours 30 minutes per pack |
| Battery Gauge | 4 LEDs | 4 LEDs | 3 LEDs | 3 LEDs |
| Published Net Weight | 4.41 lb (2 kg) | 4.74 lb (2.15 kg) | 4.0 lb (1.8 kg) | 4.0 lb (1.8 kg) blower configuration |
| Published Gross Weight | 4.85 lb (2.2 kg) | 5.11 lb (2.32 kg) | 4.4 lb (2 kg) | Bundle weight not stated |
| Manual | 3A Manual | Find 4AX2 Manual | TV1 Manual | TV1 Manual |
What's in Each Box
| Kit | Published Kit Contents |
|---|---|
| 3.0 Ah / X20-STORMJET-3A | Blower body, turbo nozzle, one 3.0 Ah battery, 21V charger, hard shell case, manual |
| 2 × 4.0 Ah / X20-STORMJET-4AX2 | Blower body, round blower nozzle, two 4.0 Ah batteries, 21V charger, manual |
| 5.0 Ah / X20-STORMJET-TV1 | Blower body, extension nozzle, turbo nozzle, one 5.0 Ah battery, 21V charger, 10 pairs of earplugs, safety goggles, black bag, manual |
| 2 × 5.0 Ah / BDL-A0311 | TV1 blower kit with extension nozzle, turbo nozzle, two 5.0 Ah batteries, charger, safety goggles, earplugs, and black bag |
Start Here: Before First Use
Install the Correct Blower Nozzle
Make the tool safe
Release the switch, remove the battery, and wait for the fan to stop before attaching any nozzle component.
X20-STORMJET-3A
Align the notches on the turbo nozzle and blower body, then slide the parts together until they click.
X20-STORMJET-4AX2
Align the round-blower-nozzle notches with the slots on both sides of the blower body, slide the parts together, and twist until the nozzle clicks into the locked position.
X20-STORMJET-TV1 and BDL-A0311
Click the extension nozzle into the blower body first, then align and click the turbo nozzle onto the extension.
Confirm a secure fit
Check that every nozzle section is fully seated and cannot pull loose before installing a battery.
Battery Charging
Remove one battery
Press the push-lock button and pull the battery out of the tool. Only one pack powers the blower at a time, even when the kit includes two.
Connect the charger
Plug the compatible 21V charger into a suitable AC outlet, then insert its charging plug into the battery's charge port.
Watch the indicator
The charger light is red while charging and green when the battery is complete.
Disconnect promptly
When the light turns green, unplug the charger from the wall first, then disconnect it from the battery. Do not leave a full pack connected.
Charge the spare separately
Two-pack kits include one charger, so repeat the process for the second battery.
| Pack Capacity | Maximum Published Time | Indicator |
|---|---|---|
| 3.0 Ah | Approximately 4 hours 30 minutes | 4 LEDs: 25%, 50%, 75%, 100% |
| 4.0 Ah | Approximately 5-6 hours per battery | 4 LEDs: 25%, 50%, 75%, 100% |
| 5.0 Ah | Approximately 7 hours 30 minutes per battery | 3-level indicator on the published TV1 pack |
Starting & Stopping
Install one charged battery
Slide the pack into the battery compartment until it clicks securely into the locked position.
Check your aim
Point the nozzle away from people, pets, windows, vehicles, loose debris, and objects that could cause a ricochet.
Start the blower
Hold the handle firmly and press the On/Off switch all the way down.
Stop the blower
Release the switch and wait for the fan to stop completely.
Pause before restarting
Wait at least five seconds after stopping before pressing the switch again to prevent excess motor heat.
Operating Safely & Cleanup Tips
Wear the right protection
Use eye and hearing protection, non-slip protective footwear, long pants, and close-fitting clothing. Add a face or dust mask in dusty conditions.
Work from stable ground
Keep firm footing and balance. Operate at ground level, never from a ladder or unstable support.
Choose suitable conditions
Use in daylight or adequate artificial light. Do not expose the tool, battery, or charger to rain or wet conditions, and stop when lightning is possible.
Keep air flowing
Never cover the air inlet or vents. Keep loose clothing, jewelry, cords, and long hair away from the inlet.
Avoid ignition hazards
Never blow burning or smoking material such as cigarettes, matches, hot ash, or embers.
Cleanup Tips
Loosen stubborn debris first
Use a rake or broom before blowing matted leaves or heavier debris.
Control dust at the surface
In dusty conditions, slightly dampen the work surface while keeping the blower, battery, and charger dry.
Follow local hours
Observe applicable noise ordinances and avoid early-morning or late-night use.
Choose a safe destination
Direct debris away from people, pets, open windows, vehicles, and ignition sources, then dispose of it properly.
Blowing Technique
Take a firm grip
Hold the handle securely with your dominant hand and use your other hand to steady the tool if needed.
Position the nozzle
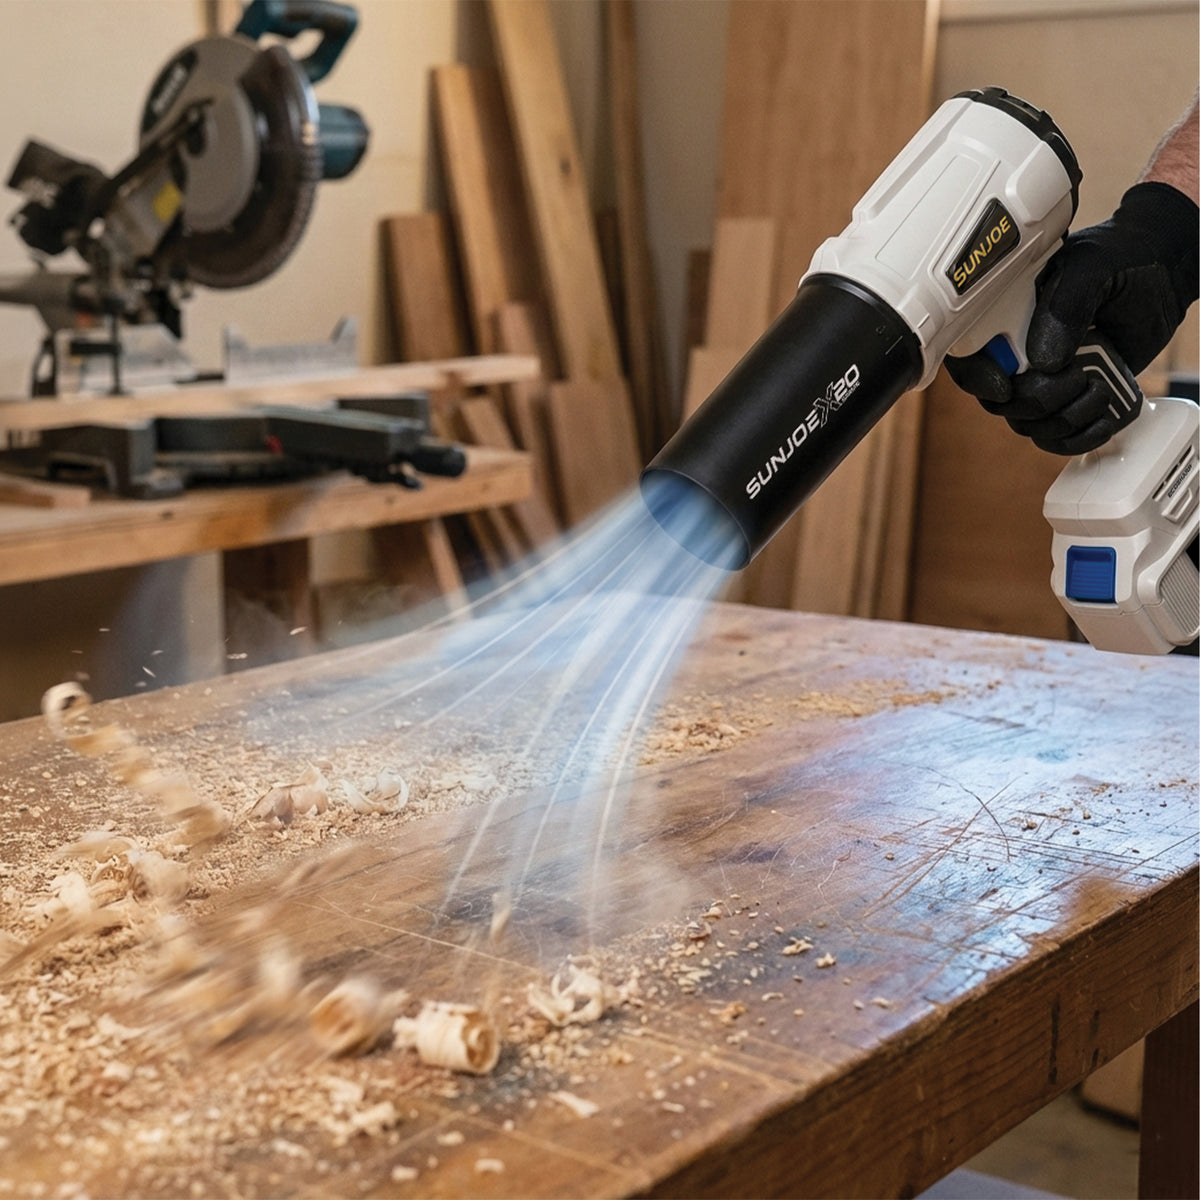
Keep the lower nozzle several inches above the ground, floor, or work surface.
Sweep side to side
Use smooth, controlled passes instead of pointing the airflow at one spot.
Advance slowly
Move forward while keeping the accumulating pile of debris in front of you.
Match the model to the job
Use the 200 CFM 4AX2 for controlled cleanup. Use the 340 CFM 3A or TV1-based blower when higher-volume airflow is appropriate.
Cleaning & Maintenance
Inspect the tool
Check the nozzle, housing, switch, handle, air inlet, and battery connection for wear, looseness, or damage.
Clear the vents
Use a dry rag or soft brush to remove dust and dirt from the air inlet and cooling vents.
Wipe the housing
If needed, use mild detergent on a damp cloth. Never let water enter or contact the tool.
Avoid harsh chemicals
Do not use caustic agents or aggressive cleaning products on plastic parts.
Arrange qualified service
Use only original replacement parts. Do not open the blower housing or attempt to service a damaged battery pack.
Storage, Accessories & Compatibility
Remove every battery
Keep packs out of the blower whenever the tool is transported or stored.
Store clean and dry
Keep the blower, manual, accessories, batteries, and charger in a secure, dry, well-ventilated place inaccessible to children.
Protect the battery terminals
Keep packs away from metal objects, heat, direct sunlight, fire, moisture, and corrosive agents.
| Guide Applies To | Published Accessory | Model |
|---|---|---|
| 3A | 20V ECOSHARP® 3.0 Ah battery | 20V-BATT-3A |
| 3A and TV1 | 21V lithium-ion charger | CZRW2200750U |
| 3A and TV1 | Turbo / round nozzle | X20-STORMJET-RNOZ |
| TV1 / BDL-A0311 | Extension nozzle | X20-STORMJET-ENOZ |
| 4AX2 | 20V ECOSHARP® 4.0 Ah battery | 20V-BATT-4A (2 included) |
| 4AX2 | Round blower nozzle | X20-STORMJET-NOZ |
| 4AX2 | X20 Series charger | GC09-2100750US |
| TV1 / BDL-A0311 | 20V ECOSHARP® 5.0 Ah battery | 20V-BATT-5A |
Troubleshooting Guide
Release the switch, remove the battery, and wait for the fan to stop before checking the nozzle, air inlet, housing, or battery connection. Perform only the safe checks below.
Unit Will Not Start or Has No Power
Possible Causes
- Battery is not fully inserted
- Battery is discharged
- Switch is not fully pressed
- Thermal protection was triggered
- Another electrical fault is present
Solutions
- Reinsert one compatible battery until it clicks
- Charge the pack for its model-specific time: 3.0 Ah up to 4 hours 30 minutes, 4.0 Ah up to 5-6 hours, or 5.0 Ah up to 7 hours 30 minutes
- Press the switch all the way down
- Remove the pack and let the unit cool for 10-15 minutes
- Contact All Season Power if it still will not start
Unit Does Not Reach Full Power or Airflow Is Weak
Possible Causes
- Battery is nearly depleted
- Air inlet or nozzle is blocked
- Overload or thermal protection was triggered
- Expected output does not match the model
Solutions
- Recharge the battery
- Turn off the blower, remove the pack, and clear external debris from the inlet and nozzle
- Let the unit cool for five minutes and retry
- Confirm the SKU: 4AX2 is rated at 200 CFM; 3A and TV1-based kits are rated at 340 CFM
Unit Stops Suddenly During Operation
Possible Causes
- Battery became depleted
- Motor thermal protection activated
- Repeated rapid start/stop cycling overheated the motor
Solutions
- Recharge or swap to the second charged pack from a two-battery kit
- Remove the battery and let the unit cool for 10-15 minutes
- Always wait at least five seconds after stopping before restarting
Blower Nozzle Is Loose or Detaches
Possible Causes
- Nozzle did not click or twist fully into place
- Attachment notches were not aligned
- The wrong nozzle procedure was used for the model
Solutions
- Turn off the blower and remove the battery
- Use the model-specific assembly steps in this guide
- Do not operate until every nozzle section is locked securely
- Arrange authorized service if a latch, slot, or notch is damaged
Excessive Vibration During Use
Possible Causes
- Foreign material may be lodged near the fan or impeller
- An internal component may be damaged
Solutions
- Stop immediately, remove the battery, and inspect the air inlet for external obstructions
- Do not touch the fan or open the housing
- Stop using the blower and contact an authorized service agent if vibration remains
Battery Drains Faster Than Expected
Possible Causes
- Cold temperature is reducing battery capacity
- Battery is aged or in reduced condition
- Frequent rapid start/stop cycling is generating heat
Solutions
- Let the battery reach normal room temperature before use
- After extended storage, charge and discharge the pack several times
- Avoid repeated start/stop cycles within a few seconds
- Use the charged spare supplied with a two-pack kit while the first pack rests or recharges
Battery Will Not Charge or Charges Very Slowly
Possible Causes
- The charger is incompatible
- Battery is too hot or too cold
- Battery was allowed to become completely depleted
Solutions
- Use only the charger specified for the exact X20 kit
- Move the pack to normal room temperature and wait 30-60 minutes
- Confirm the charger light is red during charging and green at completion
- Disconnect the charger immediately after completion
- Replace a pack that has suffered irreversible discharge damage
Battery Indicator Lights Do Not Respond
Possible Causes
- Battery is deeply discharged
- Charge-level button was not pressed correctly
- The expected LED count is for a different kit
Solutions
- Press and hold the battery indicator button
- If no lights appear, charge the battery immediately
- Expect four LEDs on the published 3A and 4AX2 packs and three LEDs on the published TV1 5.0 Ah pack
- Avoid allowing a battery to become fully discharged
Choose Your Exact Kit & Manual
Open the product listing for the battery configuration on your package. Use the manual that matches the blower model; enter X20-STORMJET-4AX2 in the official manual finder for the 2 × 4.0 Ah kit, and use the TV1 manual for the BDL-A0311 bundle.