
Meet the X20-SNOW Series


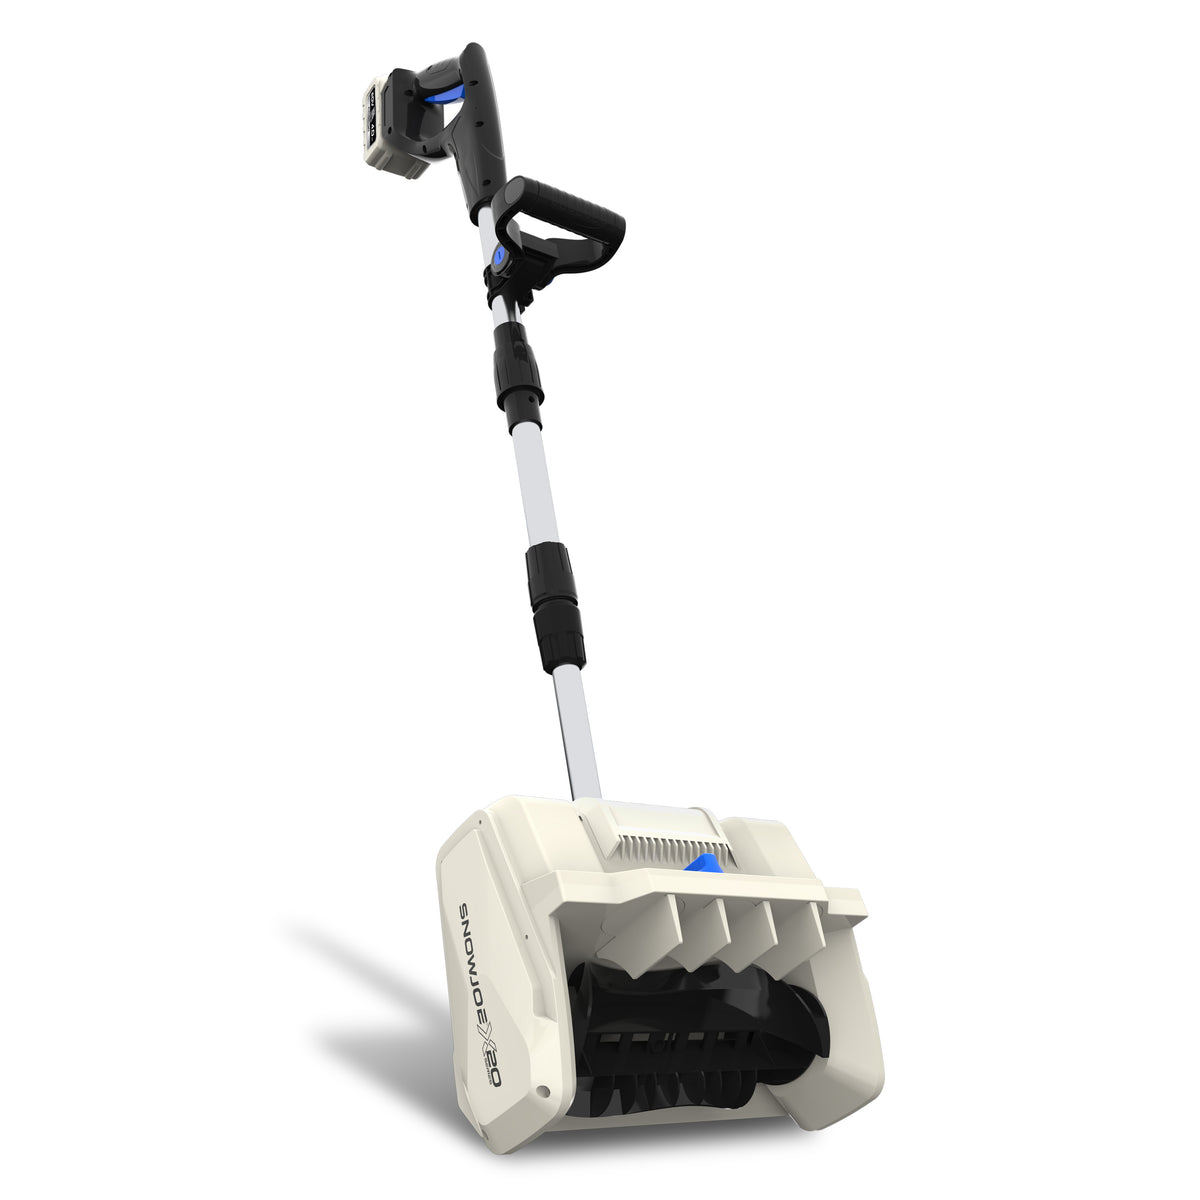



Key Components
Upper handle - primary grip for guiding and controlling the snow shovel.
Safety switch - must be pressed before squeezing the ON/OFF trigger.
Battery compartment - secures one compatible X20 ECOSHARP® battery pack.
ON/OFF trigger switch - starts and stops the auger when used with the safety switch.
Auxiliary handle + knob - adjustable second grip for two-hand control.
Middle pole + push button - joins the upper and lower pole assemblies.
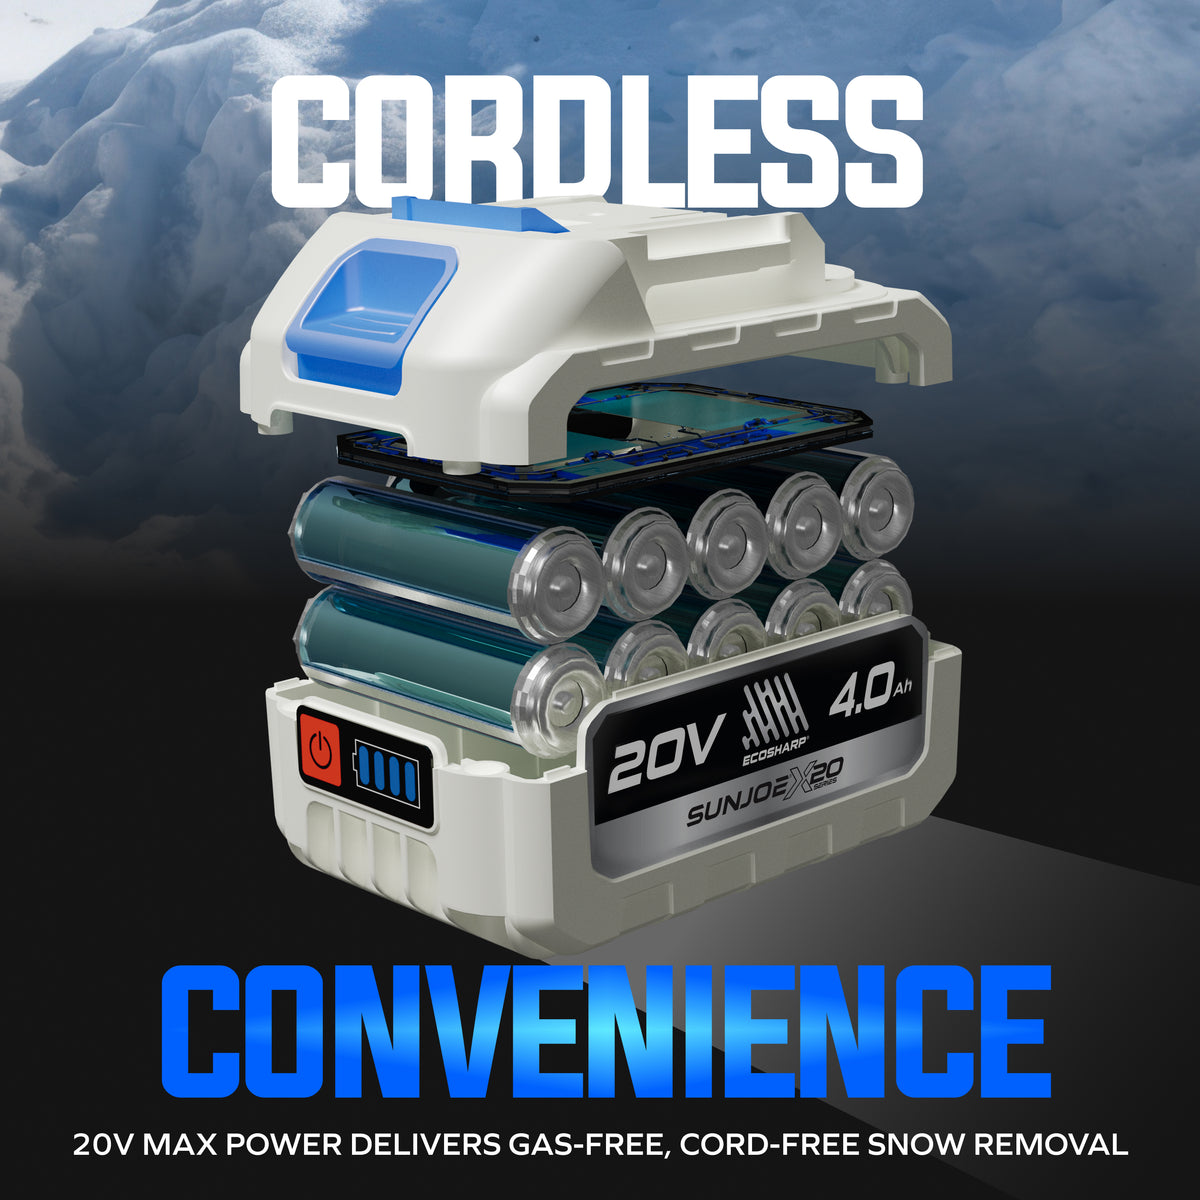
Battery + charge indicator - each included 4.0 Ah or 5.0 Ah battery has four charge-level LEDs.
Telescoping adjustment knob - locks the pole at the selected working height.
Directional chute control - directs discharge up to 45 degrees left or right.
Motor housing + shovel auger - the brushless motor and 2-blade paddle auger clear the snow path.
Snow shovel cover - included with X20-SNOW-TV1 and BDL-A0315 for clean, dry indoor storage.
Ice scraper - included with X20-SNOW-TV1 and BDL-A0315 for vehicle windows and other smooth surfaces.
Technical Specifications
| Specification | X20-SNOW-4A | X20-SNOW-5A | X20-SNOW-TV1 | BDL-A0315 | X20-SNOW-4AX2 |
|---|---|---|---|---|---|
| Product Type | Cordless snow shovel | Cordless snow shovel | Cordless snow shovel | Cordless snow shovel bundle | Cordless snow shovel |
| Best Use | Decks, steps, and paved walkways | Decks, steps, and paved walkways | Decks, steps, and paved walkways | Decks, steps, and paved walkways | Decks, steps, and paved walkways |
| Power Source | 20V ECOSHARP® lithium-ion battery | 20V ECOSHARP® lithium-ion battery | 20V ECOSHARP® lithium-ion battery | 20V ECOSHARP® lithium-ion battery | 20V ECOSHARP® lithium-ion battery |
| Battery Voltage | 20V DC max* / 18V nominal | 20V DC max* / 18V nominal | 20V DC max* / 18V nominal | 20V DC max* / 18V nominal | 20V DC max* / 18V nominal |
| Included Battery Configuration | 1 × 4.0 Ah | 1 × 5.0 Ah | 1 × 5.0 Ah | 2 × 5.0 Ah | 2 × 4.0 Ah |
| Included Battery Model | X20-BATT-4A | X20-BATT-5A | X20-BATT-5A | X20-BATT-5A (2) | X20-BATT-4A (2) |
| Included Accessories | Screwdriver | — | Screwdriver, cover, and ice scraper | Screwdriver, cover, and ice scraper | — |
| Motor | Brushless | Brushless | Brushless | Brushless | Brushless |
| No-Load Speed | 21,200 RPM | 21,200 RPM | 21,200 RPM | 21,200 RPM | 21,200 RPM |
| Rotor | 2-blade paddle auger | 2-blade paddle auger | 2-blade paddle auger | 2-blade paddle auger | 2-blade paddle auger |
| Clearing Width | 10 in. / 25 cm | 10 in. / 25 cm | 10 in. / 25 cm | 10 in. / 25 cm | 10 in. / 25 cm |
| Snow Cut Depth | Up to 5 in. / 12.7 cm | Up to 5 in. / 12.7 cm | Up to 5 in. / 12.7 cm | Up to 5 in. / 12.7 cm | Up to 5 in. / 12.7 cm |
| Maximum Throw Distance | 18 ft / 5.48 m | 18 ft / 5.48 m | 18 ft / 5.48 m | 18 ft / 5.48 m | 18 ft / 5.48 m |
| Directional Control | 45 degrees left or right | 45 degrees left or right | 45 degrees left or right | 45 degrees left or right | 45 degrees left or right |
| Charger Input | 100-240V AC, 60 Hz, 0.8 A | 120V AC, 60 Hz, 75 W | 100-240V AC, 50-60 Hz, 0.8 A | 100-240V AC, 50-60 Hz, 0.8 A | 120V AC, 60 Hz, 75 W |
| Charger Output | 21V DC, 0.75 A | 20V DC, 0.75 A | 21V DC, 0.75 A | 21V DC, 0.75 A | 20V DC, 0.75 A |
| Maximum Charge Time | 5-6 hours | 6-7 hours | 6-7 hours | 6-7 hours per battery | 5-6 hours per battery |
| Published Net Weight | 8.4 lbs / 3.8 kg | 8.4 lbs / 3.8 kg | 8.4 lbs / 3.8 kg | 8.4 lbs / 3.8 kg (shovel) | 11.8 lbs / 5.37 kg (manual figure with two supplied batteries) |
| Product Manual | Download X20-SNOW-4A Manual | Download X20-SNOW-5A Manual | Download X20-SNOW-TV1 Manual | Download Bundle Tool Manual | Download X20-SNOW-4AX2 Manual |
| Warranty | 1 Year Limited Warranty | 1 Year Limited Warranty | 1 Year Limited Warranty | 1 Year Limited Warranty | 1 Year Limited Warranty |
*Initial no-load voltage, when fully charged, peaks at 20V; nominal voltage under typical load is 18V.
What's in the Box
| Included Item | X20-SNOW-4A | X20-SNOW-5A | X20-SNOW-TV1 | BDL-A0315 | X20-SNOW-4AX2 |
|---|---|---|---|---|---|
| Cordless snow shovel upper pole assembly | ✔ | ✔ | ✔ | ✔ | ✔ |
| Cordless snow shovel lower pole assembly | ✔ | ✔ | ✔ | ✔ | ✔ |
| Middle pole with auxiliary handle | ✔ | ✔ | ✔ | ✔ | ✔ |
| Joint-fixing knob and bolt | ✔ | ✔ | ✔ | ✔ | ✔ |
| 20V ECOSHARP® 5.0 Ah lithium-ion battery | — | 1 | 1 | 2 | — |
| 20V ECOSHARP® 4.0 Ah lithium-ion battery | 1 | — | — | — | 2 |
| 20V lithium-ion battery charger | 1 | 1 | 1 | 1 | 1 |
| Screwdriver | 1 | — | 1 | 1 | — |
| Snow shovel cover | — | — | 1 | 1 | — |
| Ice scraper | — | — | 1 | 1 | — |
| Operator's manual | ✔ | ✔ | ✔ | ✔ | ✔ |
Start Here: Before First Use
Battery Charging
-
Remove the battery
Press the push-lock buttons and pull the battery pack out of the snow shovel. For BDL-A0315 and X20-SNOW-4AX2, charge each battery separately with the single included charger.
-
Connect the charger
Confirm the outlet matches the charger rating. Plug the charger adapter into the wall outlet, then connect the charger plug to the battery's charge socket.
-
Watch the status light
The charger light is red while charging and changes to green when the battery is fully charged.
-
Disconnect after charging
Allow up to 6-7 hours for each 5.0 Ah battery or 5-6 hours for each 4.0 Ah battery. Unplug the charger and disconnect the battery when charging is complete.
Assembly & Adjustment
-
Connect the poles
Raise the handle section until it is level with the middle pole. Align the groove, insert the upper section into the middle-pole connector, and turn the joint knob clockwise until fully tightened.
-
Set the pole height
Turn the telescoping adjustment knob counterclockwise to loosen it. Extend the pole to a comfortable height, then turn the knob clockwise to lock it.
-
Position the auxiliary handle
With the battery removed and the auger fully stopped, loosen the handle knob and remove the mounting screws with a screwdriver. Set the handle within its 180-degree adjustment range, reinstall the screws, and tighten the handle knob securely.
-
Set the discharge direction
With the battery removed and the auger fully stopped, turn the directional chute control left or right. The adjustment range is 45 degrees.
Included Accessory Use
Screwdriver
X20-SNOW-4A, X20-SNOW-TV1, and BDL-A0315 include a screwdriver for the auxiliary-handle mounting screws. Remove the battery and wait for the auger to stop before adjusting the handle. Do not use the screwdriver to open the motor, battery, or charger housing.
Snow shovel cover
X20-SNOW-TV1 and BDL-A0315 include a storage cover. Remove the battery, clean and dry the shovel, cover it completely, and store it indoors in a dry location. Never cover a wet machine, and always remove the cover before operation.
Ice scraper
X20-SNOW-TV1 and BDL-A0315 include an ice scraper for loose snow, frost, and light ice on vehicle windows and other smooth surfaces. Clear loose snow first, use the scraper edge without excessive force, avoid delicate surfaces that may scratch, and clean and store the scraper dry after use.
Starting & Stopping
-
Insert one battery
Slide a charged battery into the compartment until it clicks and locks in place. For BDL-A0315 and X20-SNOW-4AX2, keep the second battery outside the tool as a charged spare.
-
Use the two-step start
Press and hold the safety lock switch with your thumb, then squeeze the trigger switch with your fingers.
-
Release the safety lock
After the snow shovel powers on, release the safety lock while continuing to hold the trigger.
-
Stop the machine
Release the trigger switch. Wait for the auger to stop completely before moving, adjusting, or inspecting the unit.
Snow-Clearing Tips
Use the right pace
Push forward at a comfortable rate that lets the shovel clear the path completely. Move more slowly as snow depth increases.
Aim the discharge
Turn the directional control right to throw snow left, or left to throw snow right. Direct snow away from people, pets, windows, vehicles, and property.
Work with the wind
Throw snow downwind when possible and slightly overlap each pass for a cleaner path.
Use suitable surfaces
Use the snow shovel on decks, steps, and paved walkways. Do not clear gravel or crushed-rock surfaces.
Keep steady footing
Wear winter footwear with good traction. Keep a firm two-hand grip, walk rather than run, and use extra care on slopes and while backing up.
Clearing a Clogged Rotor
-
Shut off the motor
Release the trigger and remove the battery from the snow shovel.
-
Wait 10 seconds
Allow at least 10 seconds for the rotor blades to come to a complete stop.
-
Use a clean-out tool
Free the rotating blades with a suitable clean-out tool - never with your hands.
-
Inspect before restarting
Check the rotor housing, auger, and guards for damage or trapped foreign material before reinstalling the battery.
Maintenance & Storage
Prevent freeze-up
After clearing snow, run the machine for a few minutes to help prevent the rotor blades from freezing.
Clean and inspect
Remove snow and debris, check fasteners for tightness, and inspect for worn, loose, or damaged parts. Use only identical replacement parts.
Do not lubricate
The snow shovel does not require lubrication. Its bearings are factory-lubricated for the life of the product.
Store the shovel indoors
Store it in a locked, dry location out of children's reach. Remove the battery before storage.
Protect the batteries and charger
Store them at room temperature away from moisture. During off-season storage, recharge each battery every 6 months to about 50% capacity, shown by 2 indicator lights.
Troubleshooting Guide
Before checking the snow shovel, release the trigger, remove the battery, and wait for all moving parts to stop. Perform only the safe checks below.
Snow Shovel Will Not Start
Possible Causes
- Battery is not fully inserted or locked
- Battery is discharged
- The safety lock was not pressed before the trigger
- Battery is too hot or too cold
Solutions
- Remove and reinsert the battery until it clicks
- Charge the battery for the model-specific time
- Press and hold the safety lock, then squeeze the trigger
- Let the battery return to room temperature before use
Shovel Stops or Loses Power
Possible Causes
- Battery charge is low
- The shovel is being pushed too quickly
- Snow is too deep or heavily compacted
- Battery or motor is overheated
Solutions
- Recharge the battery; BDL-A0315 and X20-SNOW-4AX2 owners may swap in the charged second battery after the auger stops
- Reduce forward speed and clear smaller passes
- Do not force or overload the machine
- Remove the battery and allow the unit to cool before restarting
Rotor Housing Is Clogged
Possible Causes
- Wet or packed snow is blocking the housing
- A hidden foreign object entered the auger area
- The shovel was advanced too quickly
Solutions
- Release the trigger and remove the battery
- Wait at least 10 seconds for the rotor to stop
- Use a clean-out tool - never your hands
- Inspect the housing and auger for damage before restarting
Snow Is Not Clearing Efficiently
Possible Causes
- Forward speed is too fast for the snow depth
- Snow exceeds the 5-inch cut depth
- Directional control is aimed incorrectly
- Snow or ice is frozen around the auger
Solutions
- Slow down and slightly overlap each pass
- Clear deeper snow in controlled, shallow passes
- Set the directional control before restarting
- Remove the battery and clear ice only after the rotor stops
Abnormal Vibration or Impact
Possible Causes
- The auger struck a stone, wire, board, or other object
- A fastener is loose
- The auger, housing, or guard may be damaged
Solutions
- Stop immediately and remove the battery
- Inspect the unit and tighten accessible fasteners
- Do not restart until all damage is repaired
- Use authorized service for damaged components
Battery Will Not Charge
Possible Causes
- Charger is not fully connected to the outlet or battery
- Battery temperature is outside 41°F-105°F
- Battery or charger is damaged
- Battery has been deeply discharged or stored too long
Solutions
- Reconnect the charger and confirm the wall outlet works
- Let the battery return to room temperature
- Do not use a damaged battery or charger
- Use authorized service or replacement guidance
Discharge Direction Will Not Stay Set
Possible Causes
- The directional chute control is not positioned correctly
- Snow or ice is restricting the vanes
- The control or vane assembly may be damaged
Solutions
- Stop the shovel, remove the battery, and wait for the auger to stop
- Clear snow or ice from the directional vanes without using your hands near the auger
- Turn the control within its 45-degree left-or-right range before restarting
- Do not operate with a damaged control or vane assembly
Handle or Telescoping Pole Moves During Use
Possible Causes
- The auxiliary-handle knob or mounting screws are loose
- The telescoping adjustment knob is not fully tightened
- Knob threads or pole hardware may be damaged
Solutions
- Remove the battery and wait for the auger to stop
- Tighten the auxiliary-handle knob and mounting screws securely
- Set the desired pole height and turn the telescoping knob clockwise until firm
- Replace damaged hardware before operating
View the X20-SNOW Series
Open the official Shop Joe product listing or operator's manual for your kit.